Service Request System
Features
Real-time Notion Database Sync: Form submissions instantly appear as structured database entries
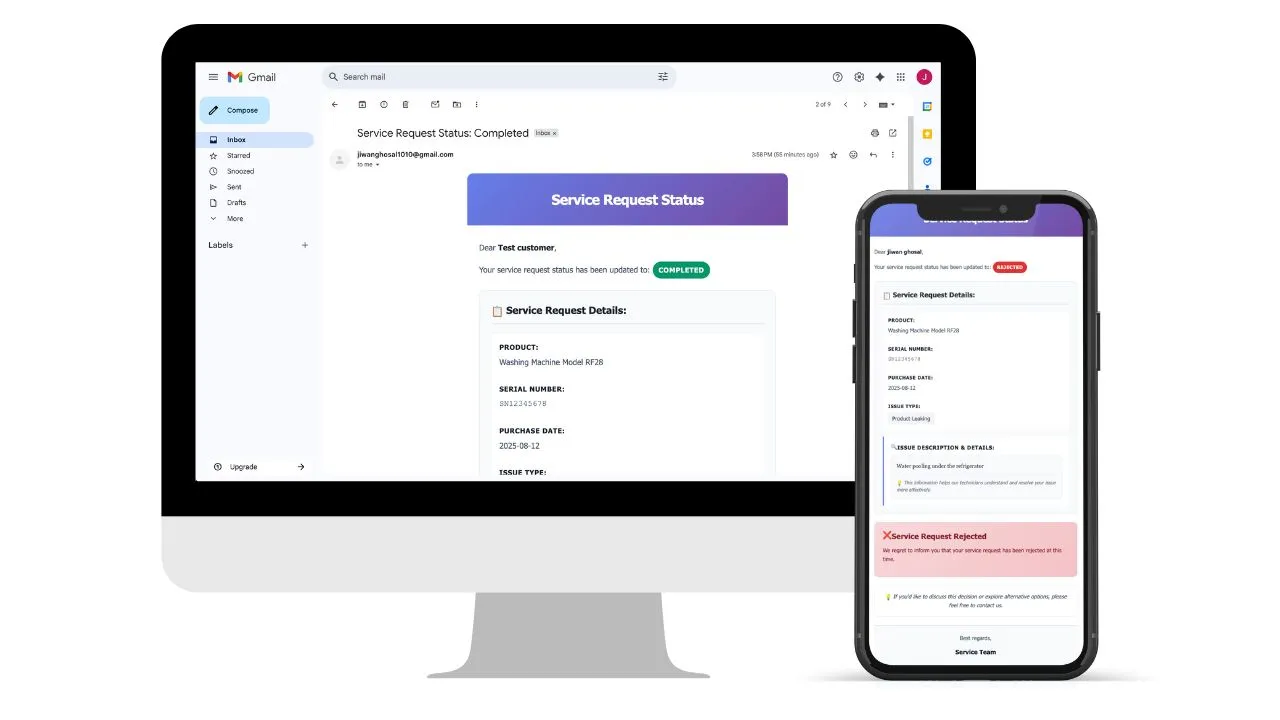
Automated Email Notifications: Smart status-based email system with professional HTML templates
Drag-and-Drop File Uploads: Images automatically stored in Notion with thumbnail previews
Dynamic Issue Type Loading: Dropdown options update automatically from your Notion database
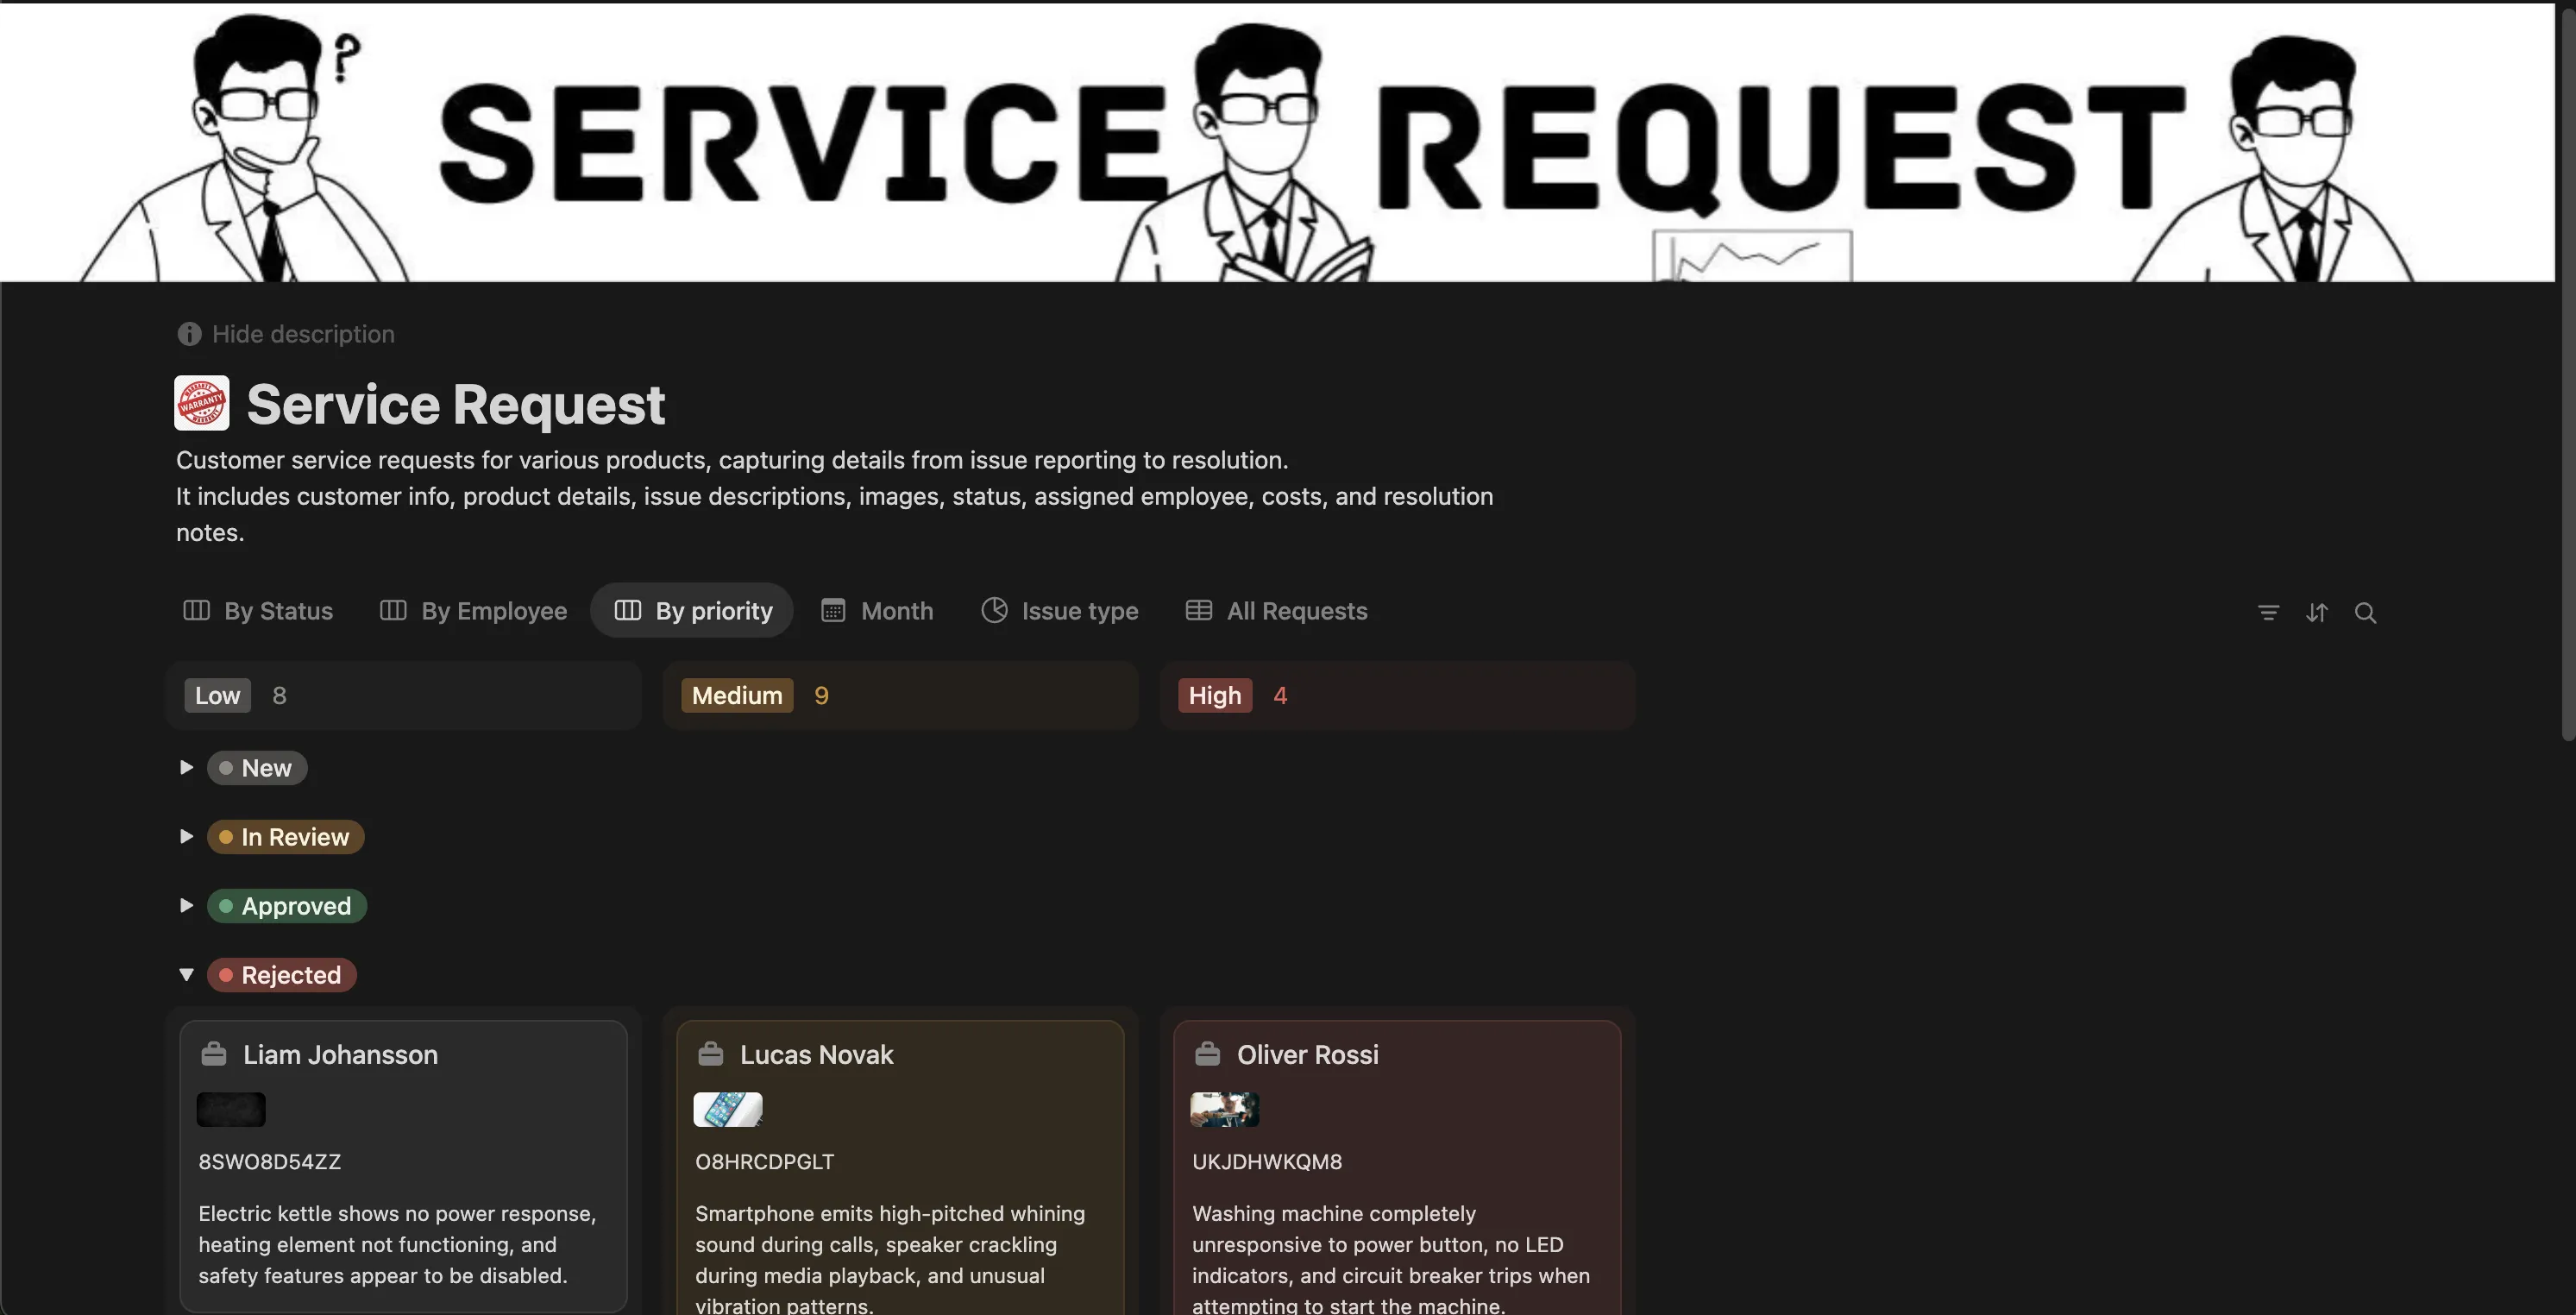
Complete Workflow Management: Multiple views for status tracking, employee assignment, and priority management
Notion-P: Service Request Management System
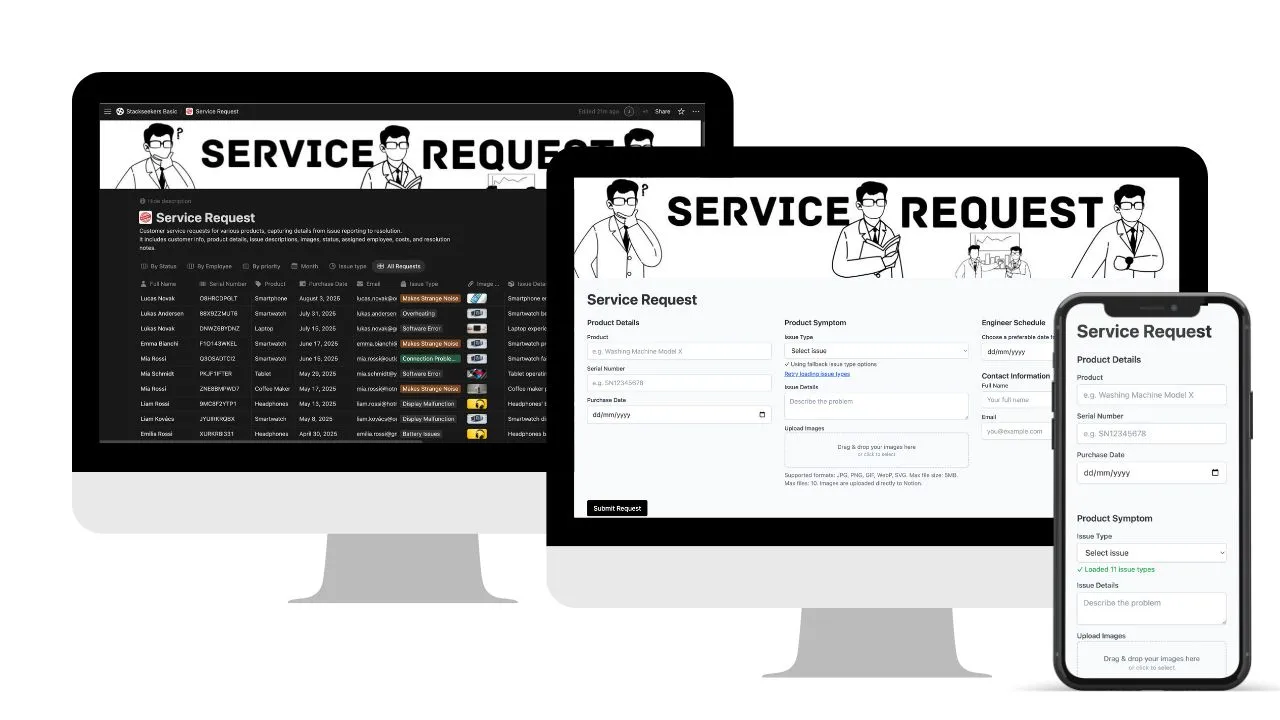
A professional web application that helps businesses manage customer service requests using Notion as a database. This system automatically saves customer requests to your Notion workspace, handles file uploads, and sends email notifications when request statuses change.
🎥 WATCH THE SETUP VIDEO
📺 Complete Setup Tutorial - Follow along with step-by-step video instructions for the easiest setup experience!

Click the image above to watch the full video tutorial
⚠️ IMPORTANT: This is NOT a 5-minute setup
Realistic Setup Time: 15-30 minutes for first-time users using the template. The demo script claims "15 minutes" for users who follow the steps exactly.
🎯 What This System Does
For Your Customers:
- Fill out a professional web form with service request details
- Upload photos of broken items or issues (up to 5MB each)
- Receive automatic email updates when their request status changes
- Get a professional, trustworthy experience
For Your Business:
- All customer requests automatically appear in your Notion database
- No more manual data entry or lost paperwork
- Automatic email notifications keep customers informed
- Everything is organized and searchable in Notion
- File uploads are securely stored and linked to requests
📋 PREREQUISITES - You Need These BEFORE Starting
Required Accounts & Access
- ✅ GitHub account (free)
- ✅ Netlify account (free)
- ✅ Notion account (free)
- ✅ Gmail account (free)
Required Knowledge
- ✅ Basic computer skills (copy/paste, following step-by-step instructions)
- ✅ Ability to create accounts on websites
- ✅ Patience - this takes time to set up correctly
What You DON'T Need
- ❌ Coding knowledge (everything is pre-built)
- ❌ Server management (Netlify handles this)
- ❌ Database expertise (Notion is user-friendly)
🚀 DETAILED SETUP GUIDE
Step 1: Set Up Your Notion Database & Integration
1.1 Create the Database First
Duplicate the Template (RECOMMENDED)
- Click this link: Database Template
- Click "Duplicate" in the top right corner
- Choose your workspace and location
- Rename it to something like "Service Requests" or "Customer Support"
⚠️ CRITICAL: The template must have these exact column names for the form to work:
Full Name(Title)Email(Email)Product(Text)Serial Number(Text)Purchase Date(Date)Issue Details(Text)Issue Type(Select) ← This is critical for the dropdownStatus(Status)Received Date(Date)Schedule Date(Date) - OptionalImage Upload(Files) - Optional
1.2 Get Database ID
- Look at your database URL:
https://notion.so/workspace-name/database-id-here - Copy the last part (the database ID) - it's a long string of letters/numbers
- Save this somewhere safe - you'll need it for the next steps
1.3 Create Notion Integration
- Go to your duplicated database in Notion
- Click the triple dot menu (⋮) in the top right
- Go to "Connections" → "Develop integration"
- It will open another tab asking to add new integration
- Click "Add new integration"
- Give it a name like "Service Request Manager"
- Choose associated workspace and type as "Internal"
- Logo is optional, then hit "Save"
- Click "Configure integration settings"
- Copy the value "Internal Integration Secret" - this is your Notion API key
- Save this somewhere safe - you'll need it for the next steps
1.4 Share Database with Integration (CRITICAL STEP!)
- Go back to your duplicated database in Notion
- Go to "Access" tab
- Select "Pages"
- Choose "Teamspace" then "Service Request" (or you can select entire teamspace)
- Hit "Update access"
- This gives your integration permission to access the database
Step 2: Set Up Gmail App Password
2.1 Enable 2-Factor Authentication
- Go to myaccount.google.com/security
- Enable "2-Step Verification" if not already enabled
2.2 Create App Password
- In the same security page, find "App passwords"
- Click "App passwords"
- Select "Mail" and "Other (Custom name)"
- Name it "Service Request Manager"
- Click "Generate"
- Copy the 16-character password (save this safely!)
Step 3: Deploy to Netlify
3.1 Create GitHub Repository
- Create a new private repository in your GitHub account
- Click "New" then give repo name and description
- Toggle "Add README" on then hit "Create repository"
- Click "Add file" followed by "Upload files"
- Use the drag-and-drop option to upload all the code files (download from the link in the description)
- This gives you complete control and privacy over your code
3.2 Connect to Netlify
- Go to netlify.com and sign up/login
- Click "New site from Git"
- Choose "GitHub"
- Select your private repository (not forked)
- Click "Deploy site"
3.3 Set Environment Variables (CRITICAL!)
- In your Netlify dashboard, go to "Site settings"
- Click "Environment variables"
- Add these exactly as shown:
NOTION_API_KEY = secret_your_actual_api_key_here
NOTION_DATABASE_ID = your_actual_database_id_here
SMTP_USER = your_email@gmail.com
SMTP_PASS = your_16_character_app_password_here- Click "Save" after each one
🚨 SECURITY WARNING: Never add these environment variables to your Git repository! They contain sensitive information like API keys and passwords. Always set them in Netlify's dashboard only.
3.4 Enable Netlify Blobs (REQUIRED for file uploads)
- In your Netlify dashboard, go to "Functions"
- Look for "Netlify Blobs" section
- If it shows "Not enabled", click "Enable"
- If you don't see this option, wait a few minutes and refresh
3.5 Redeploy
- Go to "Deploys" in your Netlify dashboard
- Click "Trigger deploy" → "Deploy site"
- Wait for deployment to complete
Step 4: Test Your System
4.1 Basic Form Test
- Visit your Netlify site URL
- Fill out the form with test data:
- Product: "Test Product"
- Serial Number: "TEST123"
- Purchase Date: Today's date
- Issue Type: Any option from your dropdown
- Description: "This is a test request"
- Client Name: "Test User"
- Client Email: "your-email@gmail.com"
- Phone: "123-456-7890"
- Don't upload files yet - test the basic form first
- Click Submit
- Check your Notion database - the request should appear automatically
4.2 File Upload Test
- Go back to your form
- Upload a small image file (under 1MB)
- Submit the form
- Check if the image appears in your Notion database
4.3 Email Test
- In your Notion database, change the Status to "Completed"
- Wait a few minutes
- Check your email for a notification
🚨 COMMON FAILURE POINTS & SOLUTIONS
❌ "Notion API key missing" Error
What you'll see: Error message or blank page Solution:
- Check your Netlify environment variables
- Make sure
NOTION_API_KEYstarts withsecret_ - Copy/paste the key exactly - no extra spaces
❌ "Database ID missing" Error
What you'll see: Error message or blank page Solution:
- Check your Netlify environment variables
- Make sure
NOTION_DATABASE_IDis the long string from your URL - No extra spaces or characters
❌ "Unauthorized" or "Forbidden" Error
What you'll see: Error when trying to submit form Solution:
- You forgot to share the database with your integration!
- Go back to Step 1.3 and share the database
- Wait a few minutes, then try again
❌ Photos not uploading
What you'll see: Form submits but no images in Notion Solution:
- Check if Netlify Blobs is enabled in your dashboard
- Wait a few minutes after first deployment
- Try uploading a smaller file (under 1MB)
- Check Netlify function logs for errors
❌ Emails not sending
What you'll see: Status changes but no email notifications Solution:
- Verify your Gmail app password is correct
- Check that
SMTP_USERis your full Gmail address - Make sure
SMTP_PASSis the 16-character app password - Check Netlify function logs for SMTP errors
❌ Form loads but dropdown is empty
What you'll see: "Loading issue types..." never changes Solution:
- Check your Netlify function logs for errors in the
get-issue-typesfunction - Verify your Notion API key has access to the database
- Make sure the "Issue Type" column exists in your database with exactly this name (case-sensitive)
- Ensure the "Issue Type" column is a Select field (not Text or other types)
- Check that the column has select options - if it's empty, the dropdown will be empty
- Verify the column name matches exactly:
Issue Type(with a space, notIssueTypeorissue type)
🔧 How It Actually Works (Technical Reality)
- Customer fills out form → Data sent to Netlify Functions (serverless backend)
- Photos get uploaded → Stored in Netlify Blobs (secure file storage)
- Data gets saved → Automatically added to your Notion database via API
- Status monitoring → System checks for changes every 2 minutes (cron job)
- Email notifications → Automatic emails sent when status changes
- File cleanup → Temporary files are automatically managed by Netlify
📱 What Your Customers Actually Experience
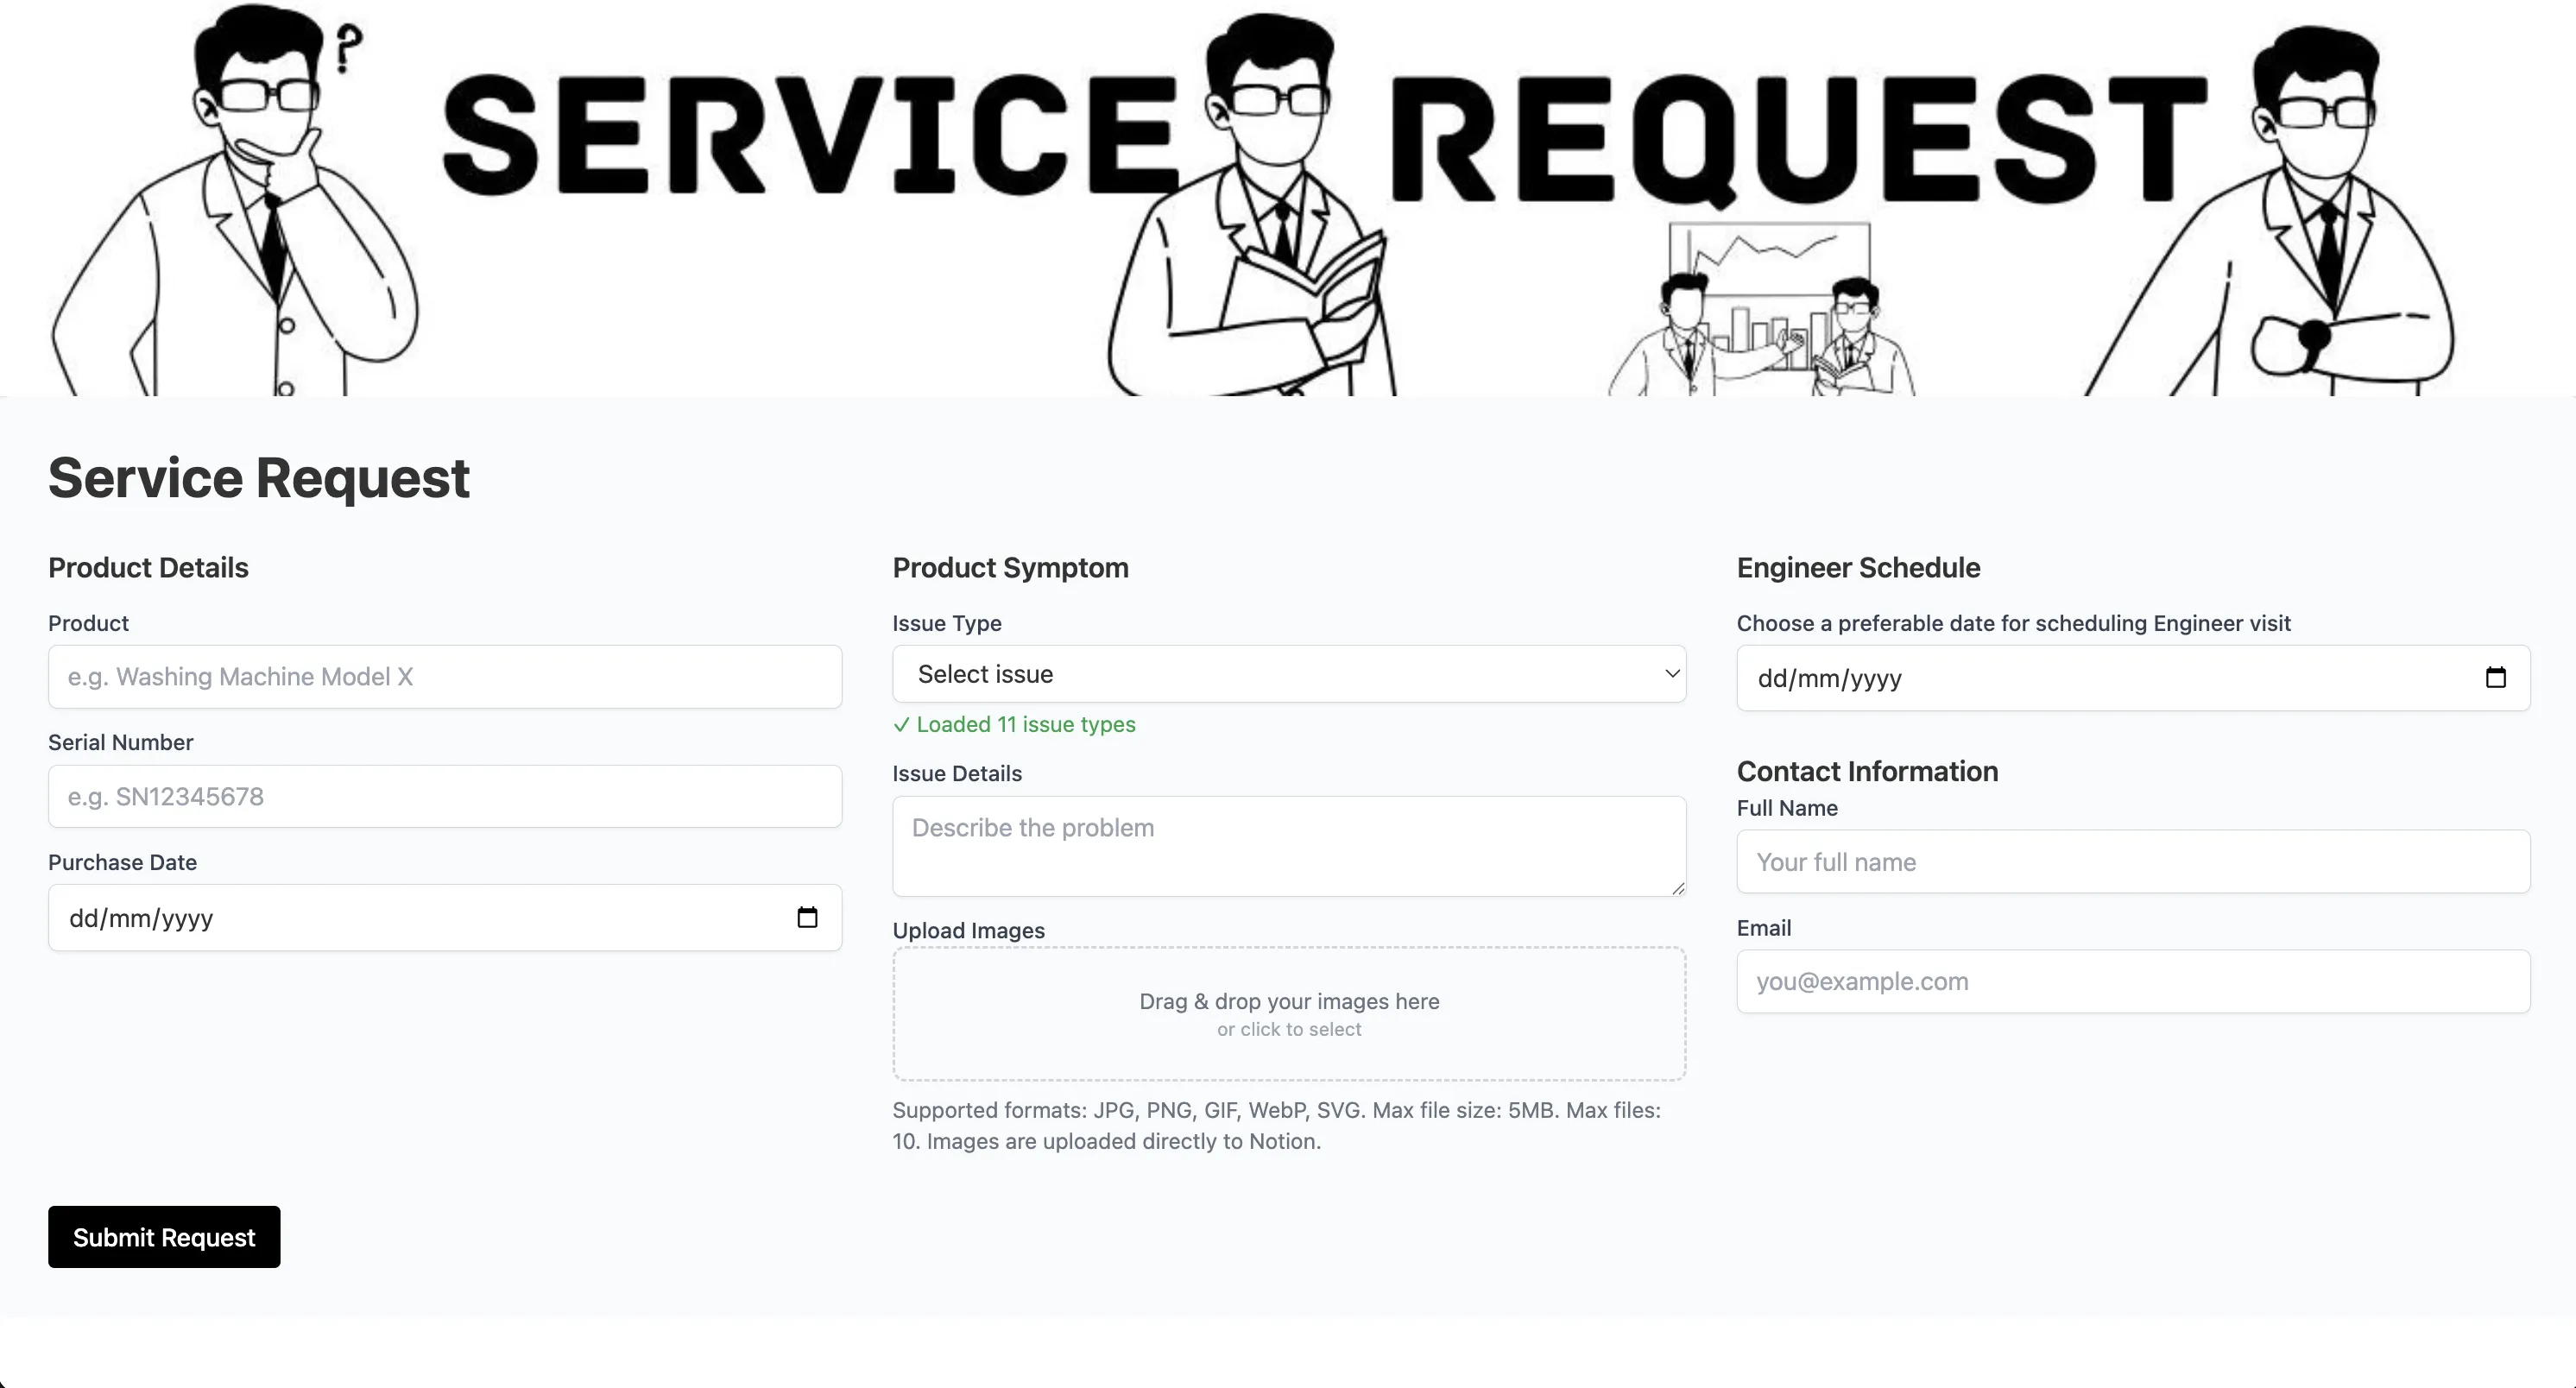
A clean, professional form where they can:
- Product Details: Enter product name, serial number, and purchase date (must be in the past)
- Product Symptom: Select issue type from dropdown (populated from your Notion database) and describe the problem
- File Upload: Drag & drop or click to upload images (up to 10 files, 5MB each, supports JPG, PNG, GIF, WebP, SVG)
- Engineer Schedule: Choose preferred date for engineer visit (must be in the future)
- Contact Information: Provide full name and email address
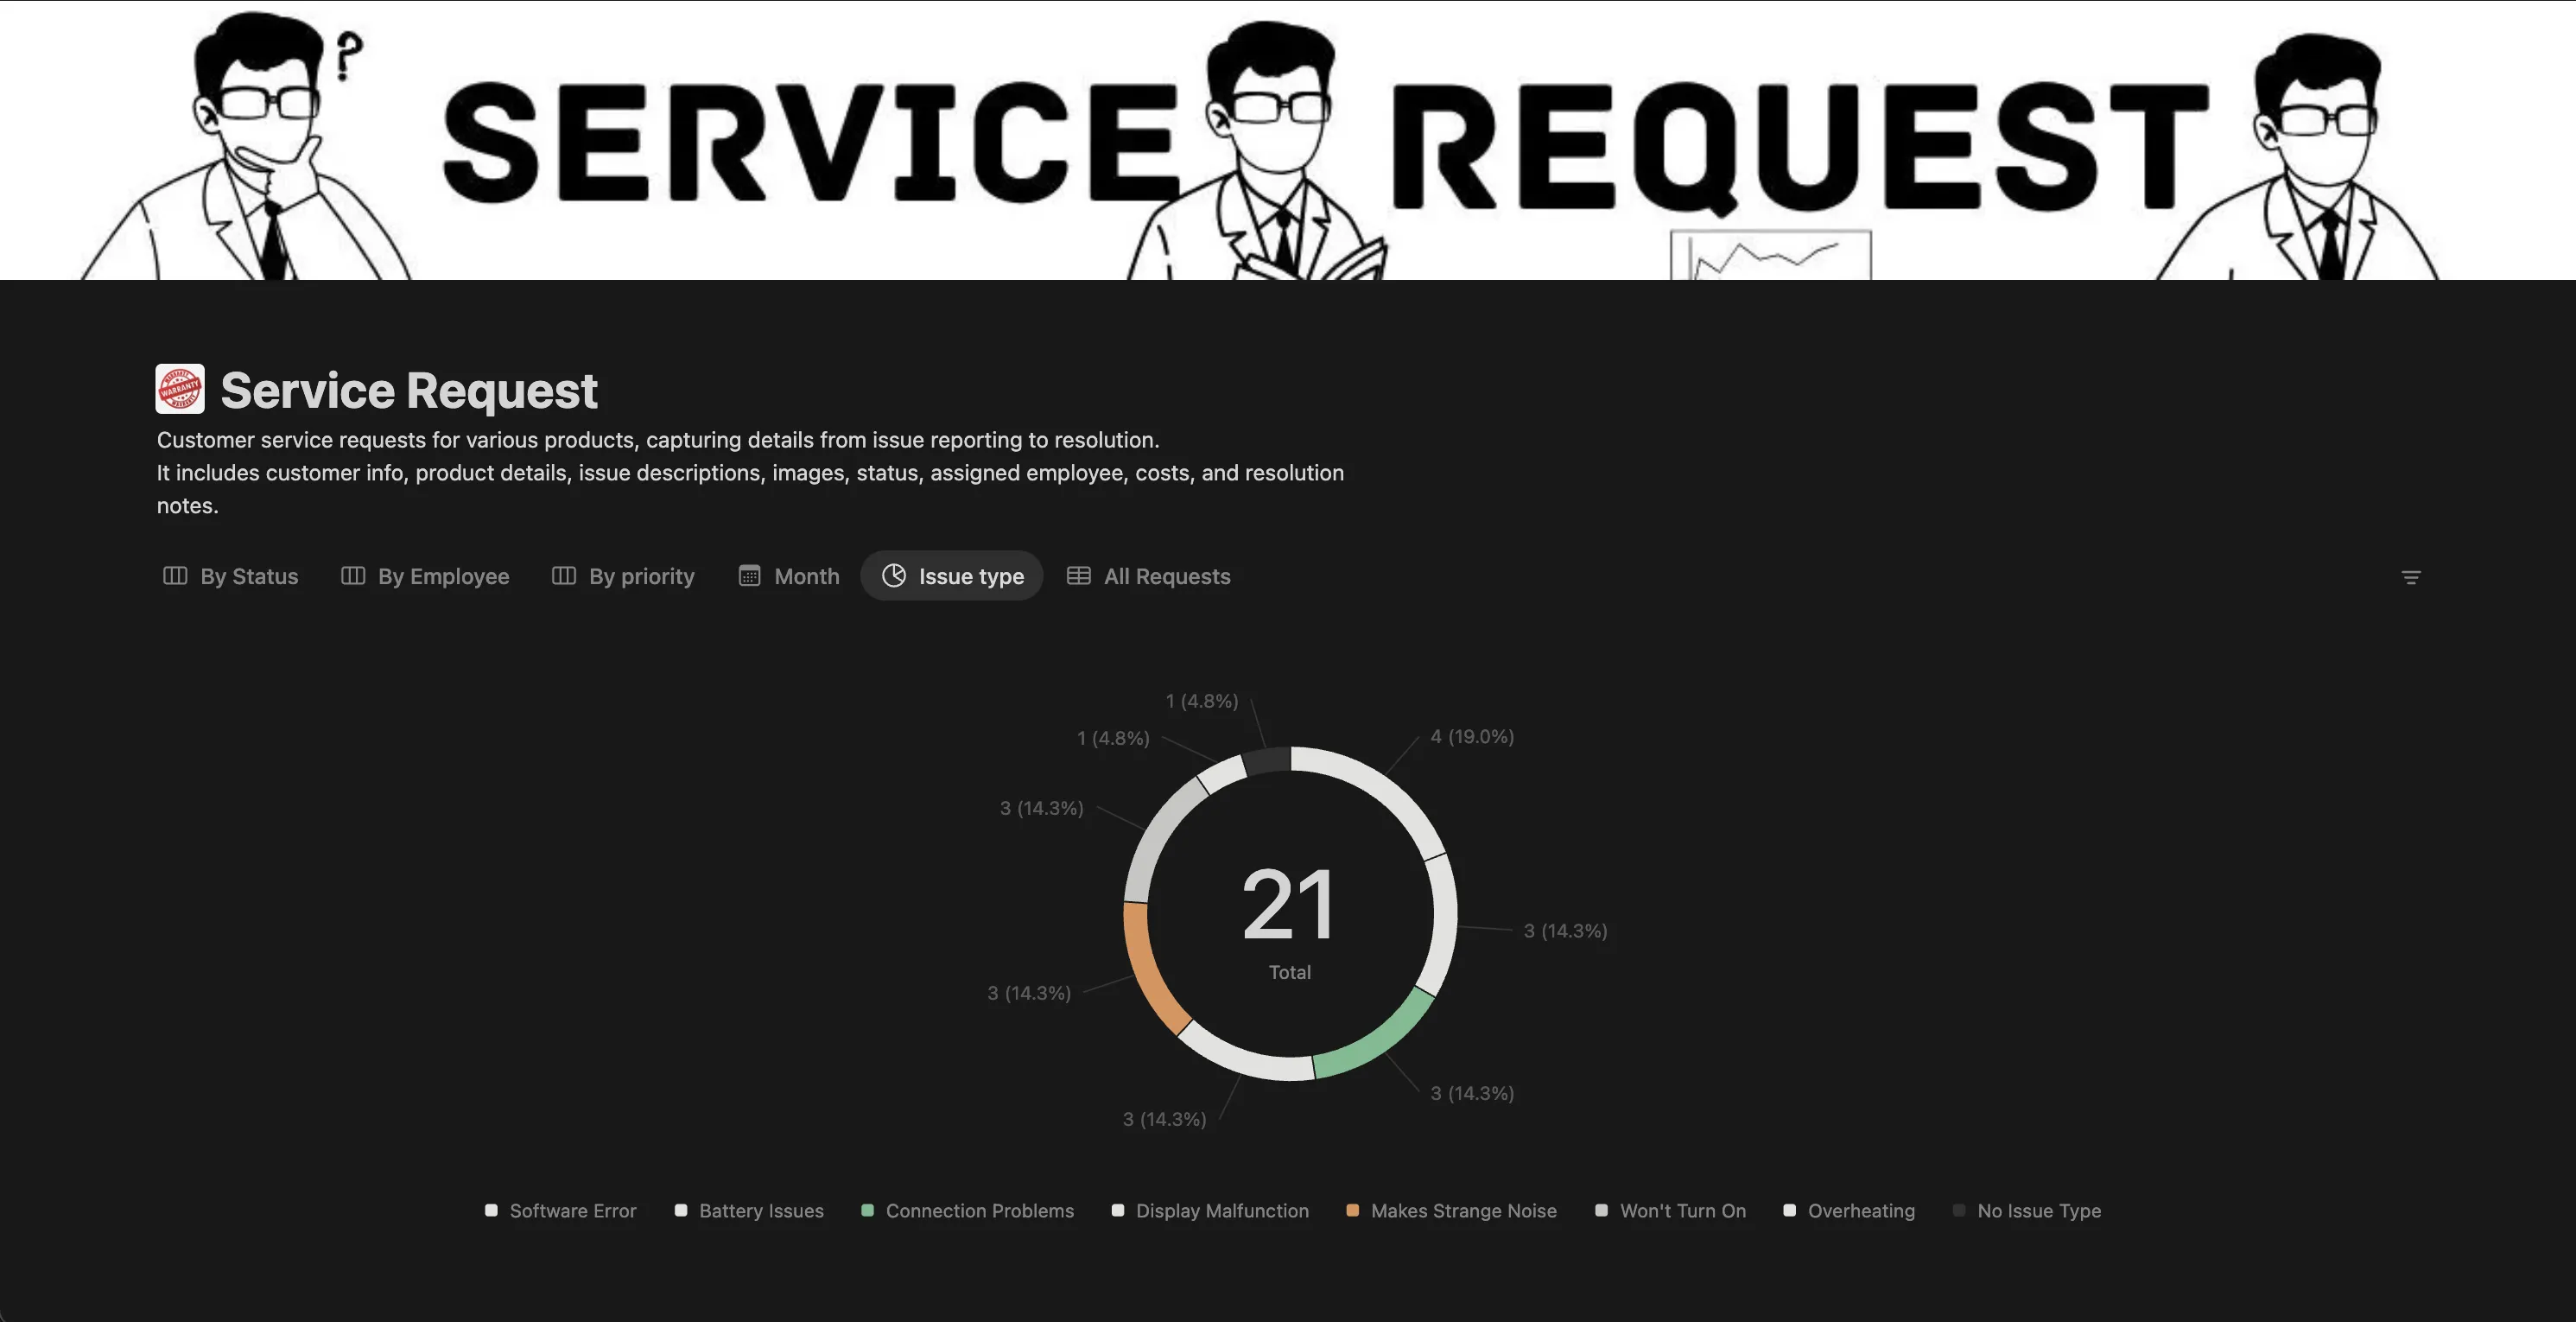
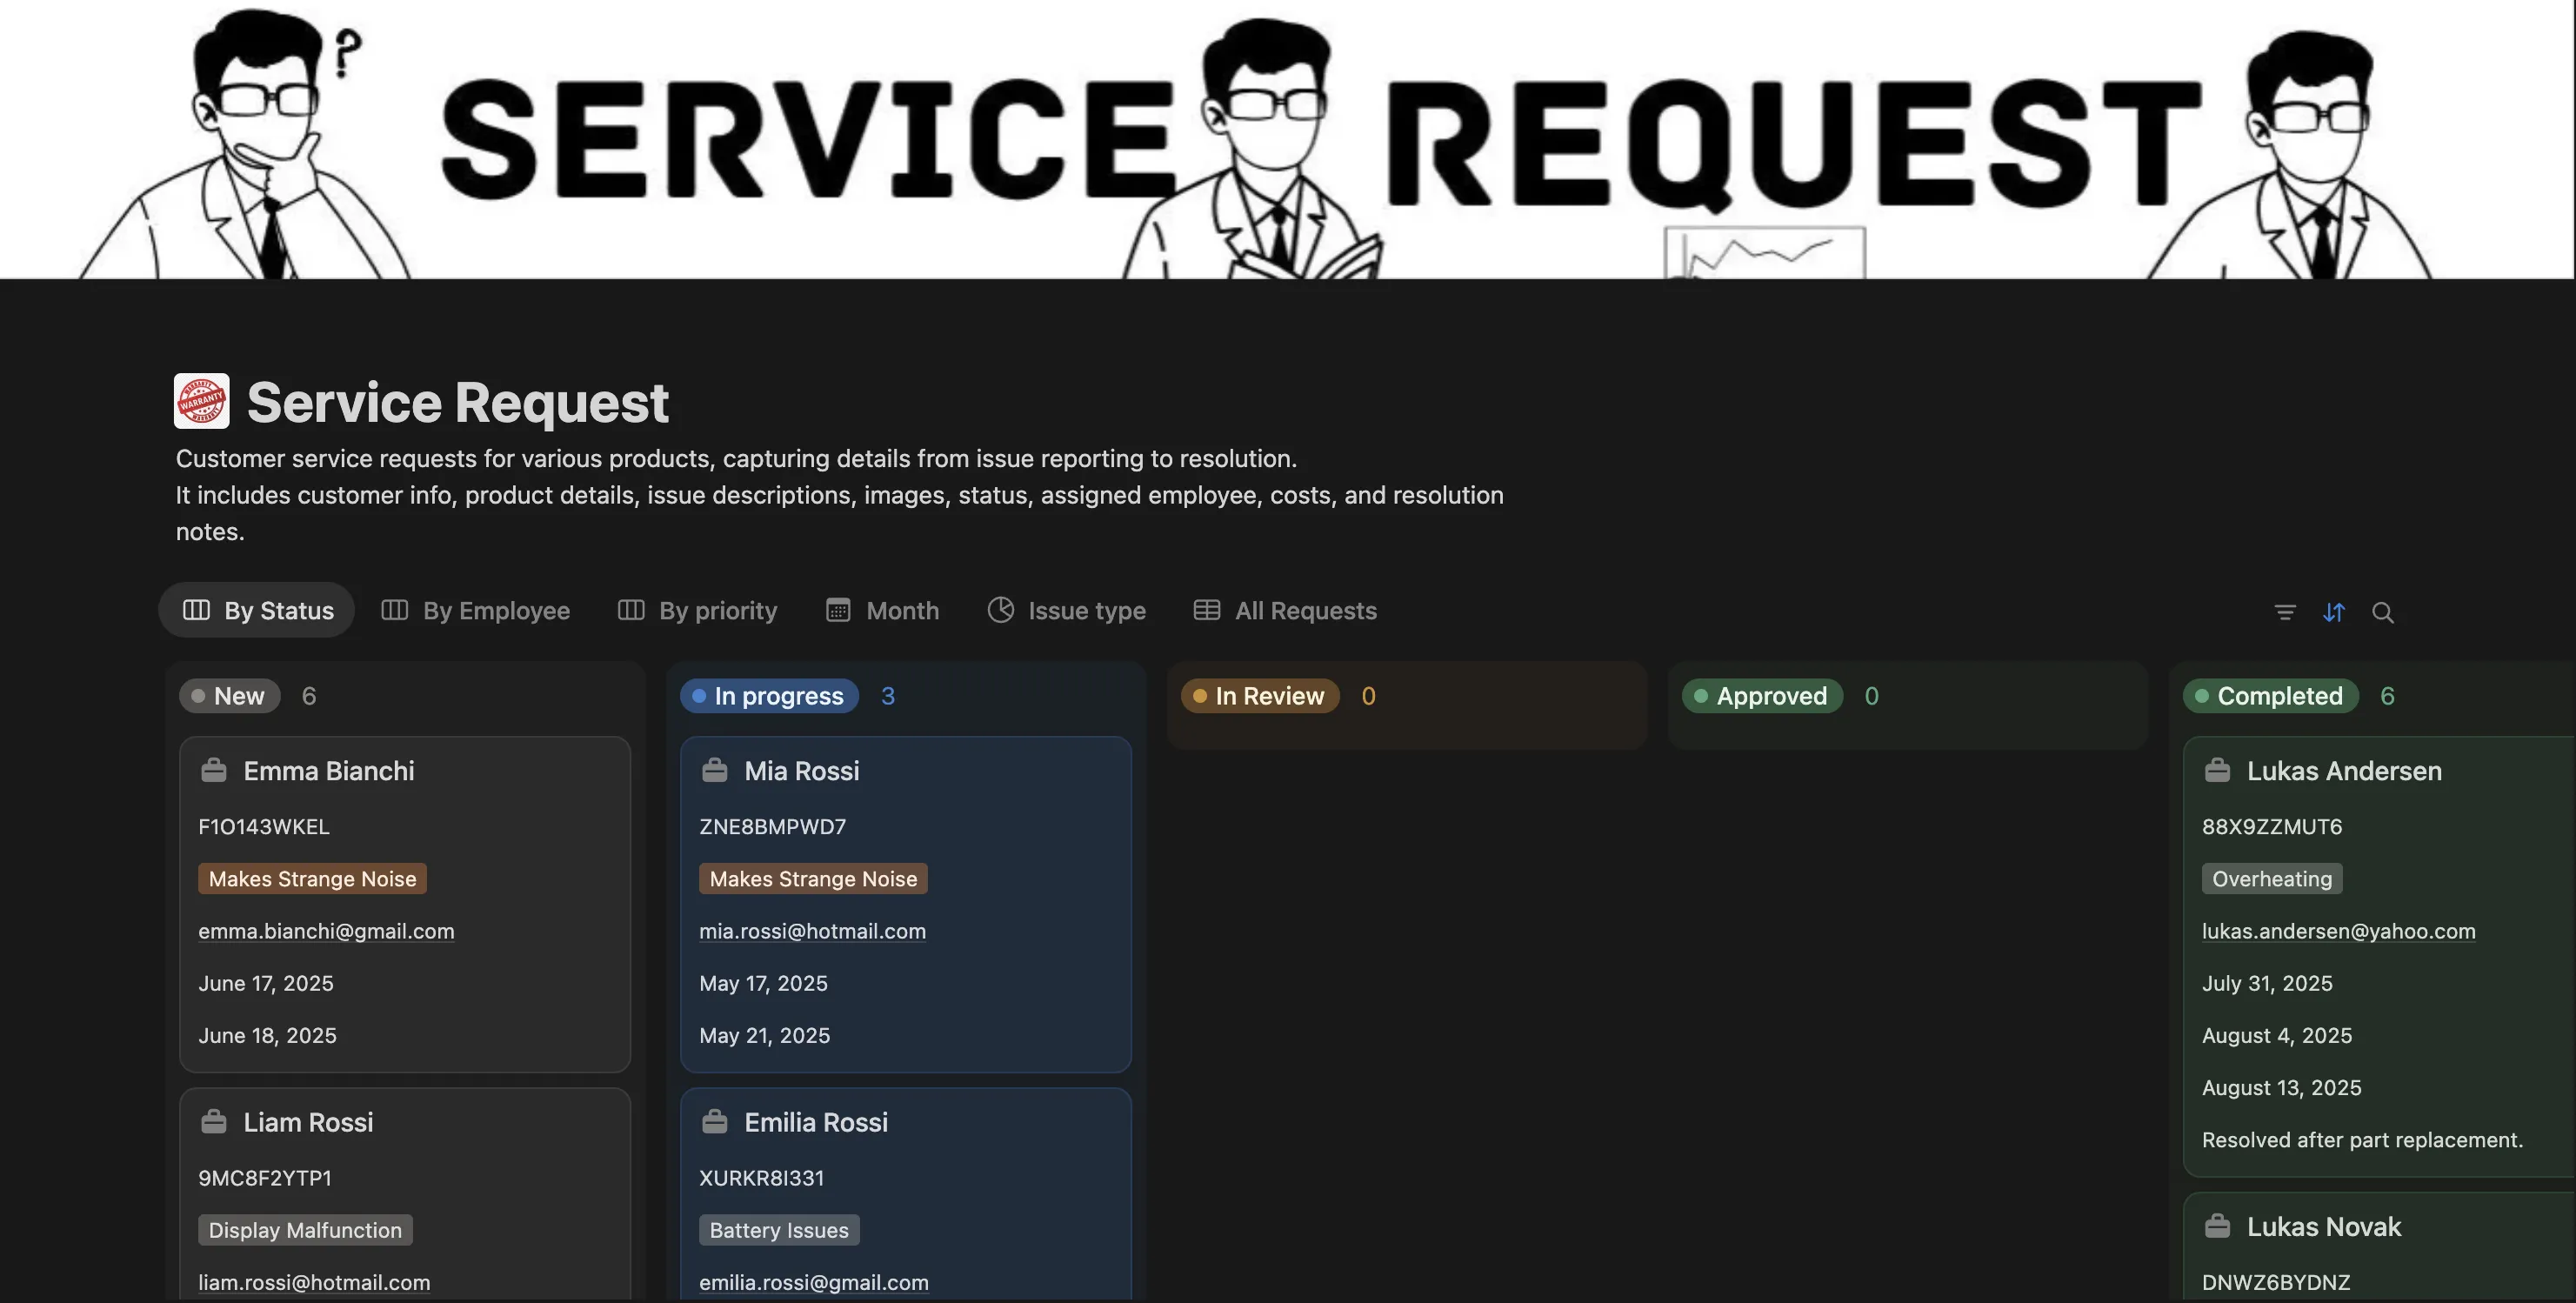
📊 What You Actually See in Notion
A well-organized database with these exact columns:
- Full Name (Title) - Customer's full name
- Email (Email) - Customer's email address
- Product (Text) - Product name and model
- Serial Number (Text) - Product serial number
- Purchase Date (Date) - When the product was purchased
- Issue Details (Text) - Description of the problem
- Issue Type (Select) - Category of the issue (populates the form dropdown)
- Status (Status) - Request status (New, In Progress, Completed, Rejected)
- Received Date (Date) - When the request was submitted
- Schedule Date (Date) - Preferred engineer visit date
- Image Upload (Files) - Uploaded photos and documents
- Email Sent (Checkbox) - Tracks if notification was sent
- Email Sent Date (Date) - When notification was sent
Plus easy filtering, searching, and multiple view options for workflow management.
🎨 Customization Options (Advanced Users)
Change the Visual Design
- Edit
public/index.htmlto modify the form design - Update the logo by replacing
public/stackseekers.jpg - Modify colors and styling using the embedded Tailwind CSS
Modify Form Fields
- Add or remove fields in the HTML form
- IMPORTANT: Update your Notion database structure to match
- Modify the JavaScript code that processes the form
Customize Email Templates
The system includes comprehensive email customization options:
Email Configuration (config.js)
- SMTP Settings: Gmail SMTP configuration (host, port, security)
- Email Subjects: Customize subject lines for different statuses
- Header Text: Modify greeting messages and status update text
- Section Titles: Change labels for product details, issue type, etc.
- Status Messages: Customize messages for "Completed" and "Rejected" statuses
- Footer Content: Update team name, website, and contact information
Email Templates (email-templates.js)
- Visual Styling: Colors, fonts, layouts, and responsive design
- Status-Specific Styling: Different colors and icons for each status
- Content Layout: Grid layouts, cards, and information organization
- Image Handling: Product image display in emails
- Branding Elements: Headers, gradients, and professional styling
What You Can Customize:
- Company branding and colors
- Email subjects and message content
- Status-specific messages for different workflows
- Visual design and layout
- SMTP settings for different email providers
- Email triggers and automation rules
💡 Pro Tips for Success
- Test locally first: Run
npm run devto test on your computer before deploying - Use Gmail app passwords: Never use your regular Gmail password
- Backup your database: Export your Notion database regularly
- Monitor your Netlify logs: Check the function logs if something isn't working
- Check the status function: The system runs every 2 minutes to check for changes
- Start small: Test with 1-2 requests before going live
- Keep API keys secure: Don't share them or commit them to public repositories
- Never commit environment variables: Keep
.envfiles out of Git and use Netlify's dashboard
🔒 Security & Privacy Features
- All data is stored securely in Notion (your data, your control)
- No customer data is stored on Netlify servers
- Photos are securely stored in Netlify Blobs
- CORS is properly configured for cross-origin requests
- File uploads are validated for type and size
- API keys are stored securely in Netlify environment variables
💰 Realistic Cost Breakdown
- Netlify: Free tier includes 100GB bandwidth and 125K function calls per month
- Notion: Free tier includes unlimited databases and 5GB file storage
- Gmail: Free for sending emails (up to 500 per day)
- Total: $0 for most small to medium businesses
🎉 What You Actually Get (After Successful Setup)
Once deployed and working, you'll have a professional service request system that:
- Saves you hours on data entry and organization
- Keeps customers informed automatically
- Organizes everything in your Notion workspace
- Looks professional and builds customer trust
- Handles file uploads securely
- Scales with your business needs
🌟 Open Source Benefits
This project is open source, which means:
- Transparency: You can see exactly how it works
- Customization: Modify it to fit your specific needs
- Community: Get help from other developers
- Security: Code is reviewed by the community
- No vendor lock-in: You own your data and can modify the system
Your customers will love the easy-to-use form, and you'll love having everything organized in one place with automatic notifications - but only after you get through the setup process successfully!
Built with ❤️ using Netlify Functions, Notion API, and modern web technologies
